Showing posts with label Editing. Show all posts

Sunday, 17 March 2013

Music Editing onto Film

Editing Music

Beginning

This is the beginning part of the music editing in which we have use my own piece of music which is a fast and bass drum which conforms with our opening scene which is also very fast paced. We wanted to keep the music more stark rather than really over layed and too disorientating. I had to drag the clip forward because the music started too late into the credits and therefore this meant that we had to adjust it slightly. I also faded out the end in order to make sure that it didn't fade over into the skyline shot.


POV Shot

With the POV shot we wanted to make the music eerie in order to conform with it being dark and also that the clown appears in random shots throughout. We therefore got the majority of the music from SoundCloud and then edited it on Audacity to speed up and also distort to make them uncomfortable for the viewer. We then over layed them together and discovered that they worked reall well, plus with the Drama Dark Suspense sound from iMovie then then added the small noises to it that were not avalible before. The breathing begins when he walks into the tunnel and therefore you can tell that as the clown gets closer to him it starts to affect him in a particular way and therefore conforms with what is happening even though he cannot see the clown. This therefore conforms with a supernatural genre as before the character comes into contact with the antagonist there is usually eerie or suspenseful music closely followed by the emphasised sound of them breathing over the top in order to show fear or anxiety.

Tunnel

For the CCTV shots we decided to use a more carnival type of music and therefore this means that the death is approaching and the clown is gradually getting closer to him. It also goes with his walking and when the clips cut it smoothly transitions back after static without being too mixed up. The music is interrupted by the sound of the white noise and also the static image which is sudden and breaks the scene up into different segments of filming and also music. We then layered a Heartbeat which came from iMovie and this therefore creates tension because if you can hear someones heartbeat it makes the viewers beat slightly faster making them feel anxious and also perhaps implying that something is going to occur soon. The heartbeat is also cut out by the static and therefore implies that the tape is changing from one to another.

Montage Scene

For the montage scene we decided to get our music from the internet and in particular music box music which is more high pitched and dream like rather than the others. We did think about possibly using a high pitched frequency but instead found that the music box was just as effective. The music fits really well with the film inlcuding when he looks from side to side and the music beats follow in time with it. The static in the beginning is longer and therefore this meant that it showed a change taking place and something bad is going to happen. The music for the montage scene was the most important as it is the most stand out scene and therefore the music had to show this as well rather than diverting on a differnt tangent which would have confused the viewer.


Ending

For the final scene we decided to cut out the music and leave it as just silence along with the interrupting parts of static which cut up the film. By having it as silence at the end it makes it much more sinister and conforms with the fact that he has just died because not only has the music gone but also the heart beat which therefore confirms that the protagonist is dead. I think that the scene works really well without any other sounds because this means that you solely focus on the scene and the fact that he has just been killed rather than over doing it with a lot of music. 

Montage Editing

We put the clips in a timeline with the music as it shows the progression of the death. This was simply done by dragging the clips from the saved files and putting them in order. The order was storyboarded beforehand so that we knew how to  get it right. 

We decided to edit the clip because we had to make it appear more supernatural. So here, we changed the speed of the montage to 340%. This speed meant that there is more of a surprise factor about the montage because you never know what is coming next as it is going so fast. We also had to change the duration of the clip to make sure that the montage was even quicker. 

Changing the audio on the clip was very important because of the non-diegetic sound that we wanted to put over the top. We therefore had to get rid of any diegetic sound that may have come with the clips that we edited together. This was simply done by completely cutting the audio volume on inspector. Inspector allows for any background noise to be diminished which is very important.

Editing the video colour was also important because the exposure etc have to be exactly right in order for the full effect of the images to hit. The high contrast allows for the makeup on the clown to become a lot darker and it also allows for more shadows to appear, making the image scarier to look at.

Adding an effect to the clown image in particular was really simple. We just had to choose the image that we wanted to edit and then choose the effect. After scrolling through all of the different effects, we decided upon Sci Fi as the green tint to the image conforms to the expectations of a supernatural horror film - it implys the presence of a supernatural being.

Obviously, incorporating the actual death scene in the montage was necessary because we wanted the audience to understand what exactly was going on and not confuse them with the montage. This was simply done by dragging from the saved files in our media folder and cutting them down to the appropriate length. We chose not to make them too long as we wanted the focus to be on the other images.

Monday, 28 January 2013

Changes to Filming

On location, we discovered that there were problems with some of the original decided features of our scene:
  • When filming our test shots, it became apparent that the path we had originally chosen for the victim to follow around the Royal Naval College into the foot-tunnel would cause difficulties. We had to block out a separate route through the grounds ensuring that no restaurants, passing visitors, sign posts for the gift shop or shots in which the glass casing of the Cutty Sark were visible. This proved difficult due to the lack of lighting upon the foot-paths in the area and the obvious commercialisation of the location.
  • On our original storyboard, no filming was included from the individual view of the victim as we decided to film the majority in CCTV format due to no intended empathy being felt towards the victim as an emotional bond between them and the audience as their character is insignificant as part of the plot.
  • The skyline shots we are using within our scene originally were not planned and were added as a decision during filming. We had planned to include establishing shots to determine the importance of our location as an anonymous city (London) but originally of the college and Cutty Sark itself but on location, we found the brighter and more definitive example of London as a location would have been better represented using the skyline shot of the City buildings across the Thames as a universal symbol.
  • Our first plan depicted the entirity of the scene filmed in the tunnel to be produced in black and white as CCTV footage but due to the supernaturality of our plot and our intention to emphasise this, we can now chosen to switch between colour during these shots to distort the image.


Tuesday, 22 January 2013

Editing for a second time.


More Editing. 


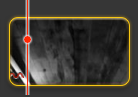
After the first editing session, we all decided that it there were still a few more clips left over that we could include within our film opening first sequence before the credits. We had a few clips in which were left over from the filming, in which included disorientating shots, that could foreshadow what is to come within our film opening. By selecting the piece of the clip in which I wanted to be included in the original opening,  I selected the clip, and split it, so that i would be able to source the piece that was needed for the opening. I then placed this back onto the dashboard,to enable it to be considered part of the film opening, and played it various times to make sure that it fitted in with rest of the film opening in which had already been editing and looked consistent with the rest of the footage.  Although I liked the consistency with the rest of the clips, i felt that it needed to have a smoother transition, and needed to fade to black to enable the consistency to continue.

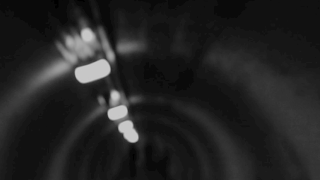
As there is a lot of darkness in our clip, with the monochrome setting, I decided it would look better if it fades to black at the end, to enable the smooth transition at the end to continue on to the next clip. By clicking on the transitions, and then searching through to find fade to black, i then chose this to work together with the clip that I was editing to make sure that it would fade in, and also fade out, which would make it consistent with the rest of the clip, and would not look completely different from the rest of the clip, it would also mean that altogether the clip would run smoothly with nothing drawing paticular attention from the audience's perspective.


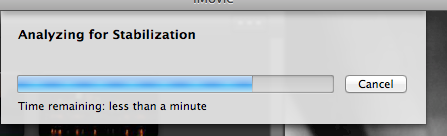
As the clip that was introduced was not as steady as the rest of the film opening, i had to run a stabilisation analysis, to determine how stabilised the rest of the film opening is, and which will then compare this to the clip that i am about to introduce. This took around 5 minutes, but the analysis was finally complete, and I then applied this to the clip to stabilise the clip, to continue the consistency onto the next of the clips which will be included within the opening.

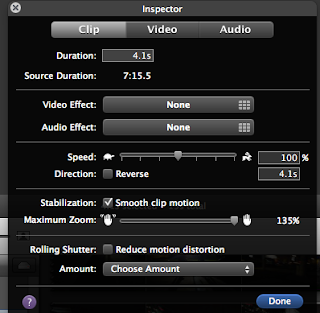
There were many things in which I changed about the clip, to make sure that I got the best out of the set materials that I wanted. The source clip for this particular extract was only 4 seconds long, as the film opening is only 2 minutes and I did not want to bore the audience or drag the clip out for more than which was intended. I did not think that any video effects or audio effects needed to be added, but i did take out any of the sound effects, as I was not sure if a voice over needed to be included. The speed was kept the same, but i stabilised the clip using the smooth clip motion, as mentioned in the above analysis of the print screen. The maximum zoom was just allowing how strong and close up the zoom would be, in which i though would be necessary to obtain the detail within the location.


Monday, 14 January 2013

Editing Choices


Shot One- Rolling Credits
Applying a bleach bypass effect
Increased speed up to four times it's original pace


Shot Two- London skyline
Applied bleach bypass effect
Speed increased by half


Shot Three- London Skyline
Speed increased four times
Reduced Motion Distortion
Increased zoom by 7%
Smoothed stability

 Shot Five- London Skyline

Increased zoom by 16%
Smoothed stability
Reduced motion distortion


We wanted to increase the speed at the beginning to shock the audience and set the a fast pace for our opening. We sped up the clip duration to enable us to fit in more shots and we liked the resulting effect. By speeding up the start, the audience have no idea what is going on, which is our intention, as we wanted the audience to be confused and disorientated. By using the tunnel shots, it allowed a smooth movement going through the tunnel and established the location.


When we applied the bleach bypass, we wanted an effect that darkened the tunnel and created a dirtier more sinister horror effect, as it complemented the surroundings and created shadows on the walls, in which would interest the audience to what unusual events are occuring within the tunnel.


When editing the skyline, we decided to stabilise the establishing shot, as we did not want it to jolt. Our intention was for the establishing shot to be a serene shot, in contrast to the tunnel opening it follows. The shot included London lit-up at night and we increased the contrast to enable the audience to be able to establish the buildings in the shot, and connect it with London. The motion distortion was needed to enable the smooth movement, as when it was first shot, it was taken through shaken hands, which post-filming we decided wasn't an effect we felt appropriate for this shot.